Distributing command line tools for macOS
In this post I’ll show how to properly distribute a command line tool for macOS.
- Background
- Prerequisites
- Code signing certificates
- App Store Connect API key
- Process binaries
- Create installer package
- Process installer package
- Secret storage
Background
I maintain many command line tools at work and for personal projects, like Hatch. A good user experience requires that installation is easy and reliable on all platforms, and I’ve found that macOS is the most difficult to support.
This guide will not cover how to get your project on Homebrew as that is already fairly well documented with plenty of examples. Instead, I will assume you want to distribute your project as both a standalone binary and an installer package (.pkg file).
I’ll assume the CLI has already been built and is called rusty (harkening back to a previous post).
Prerequisites
- An Apple developer account
- OpenSSL available on PATH as
openssl - apple-codesign available on PATH as
rcodesign - A macOS machine with Command Line Tools for Xcode
Creating the installer package is the only part that requires being on macOS.
Code signing certificates
The standalone binary and installer package each need to be signed or else Gatekeeper will block them.
We will need to create two types of signing certificates:
- One for the binary itself called a
Developer ID Application - One for the installer package called a
Developer ID Installer
The process is the same for both:
- Create a Certificate Signing Request (CSR) from a private key
- Upload the CSR to Apple
- Download the certificate from Apple
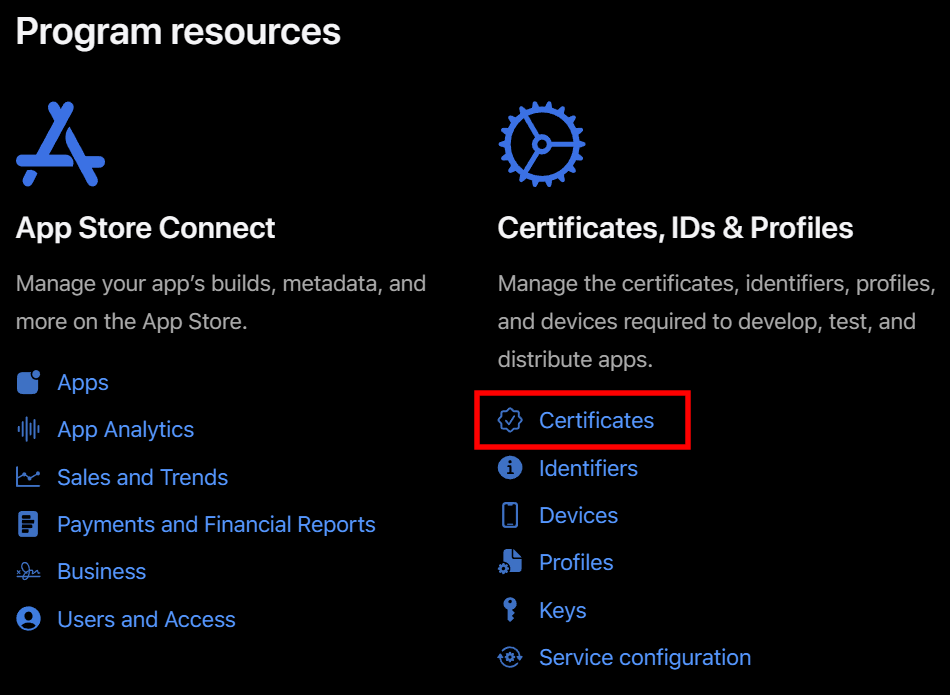
Go to the Apple Developer Portal and click on the Certificates link:
Developer ID Application
Create a private key:
openssl genrsa -out private_key_application.pem 2048
Create a CSR from the private key:
rcodesign generate-certificate-signing-request --pem-source private_key_application.pem --csr-pem-path csr.pem
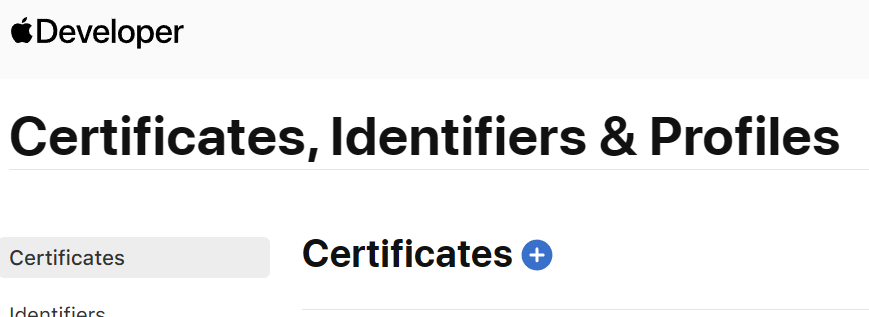
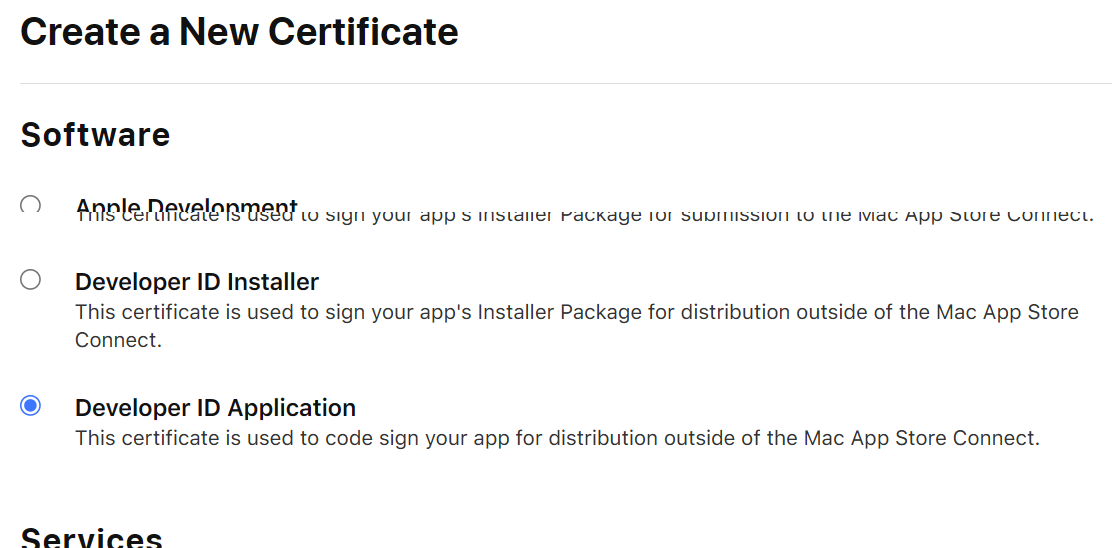
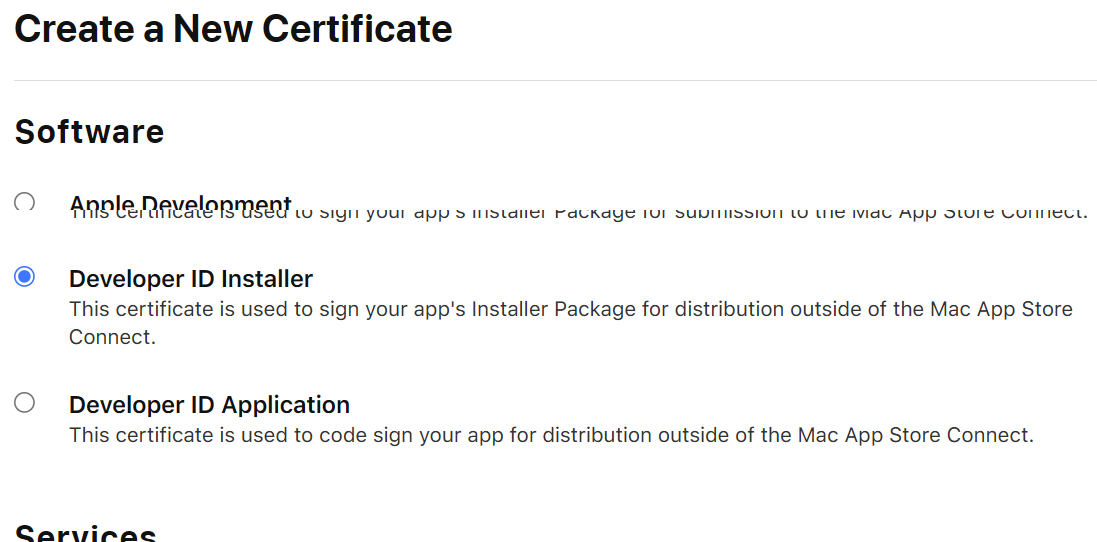
Start creating the Developer ID Application certificate:
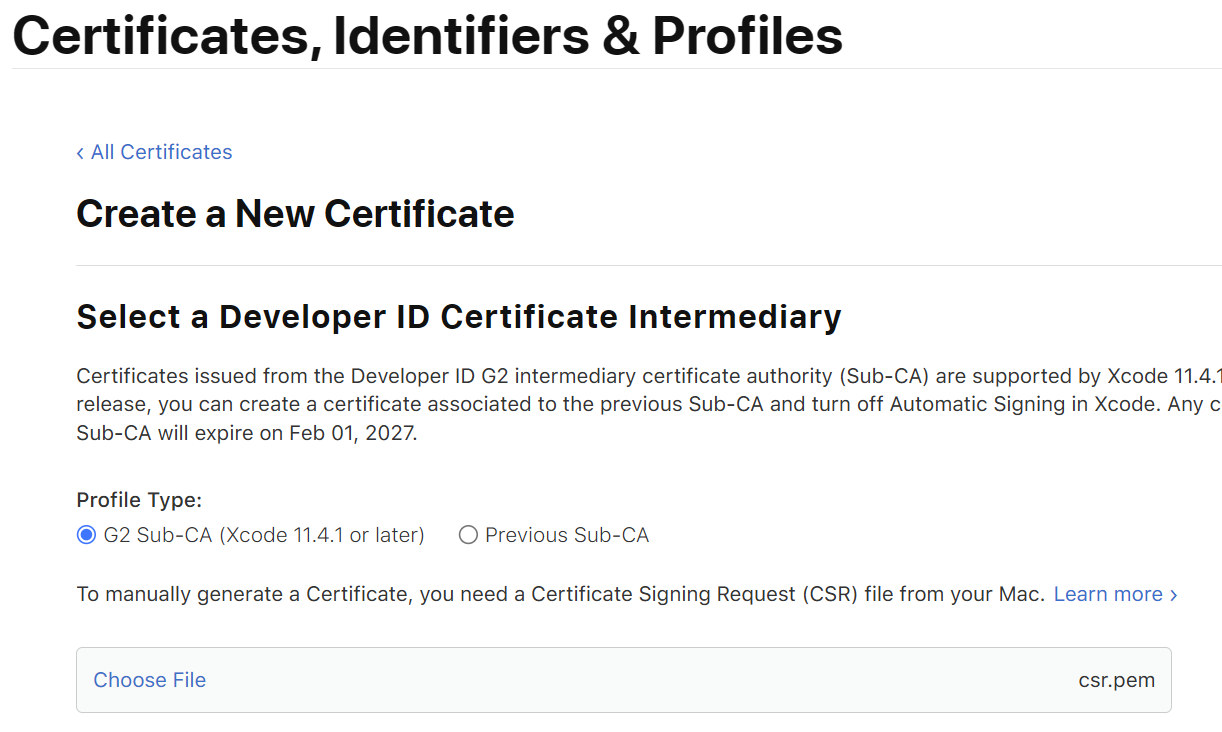
Choose the G2 Sub-CA option and upload the csr.pem file:
You should see the following page with the ability to download the certificate:
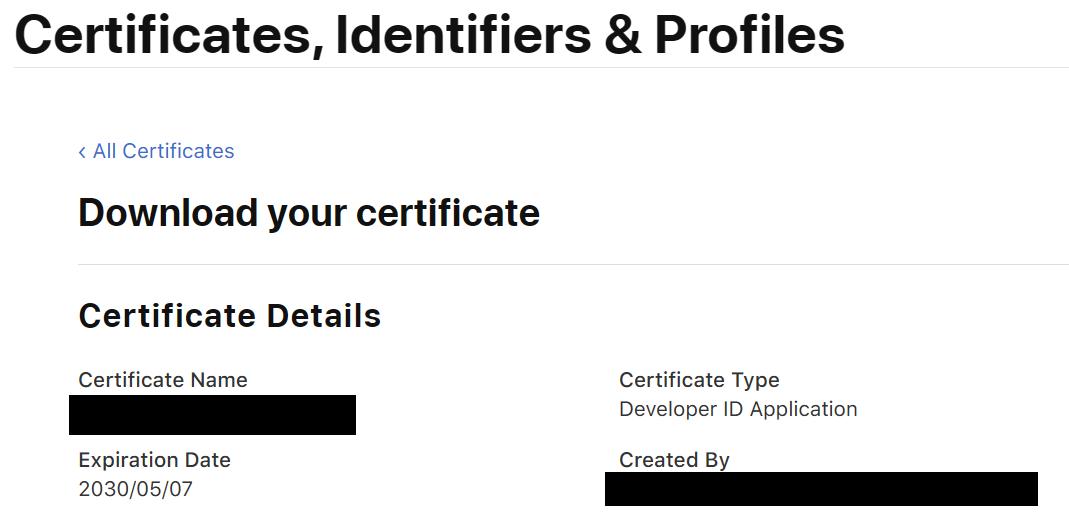
The certificate you download is in the binary DER format (.cer), which isn’t very portable. Let’s turn it into a PEM file:
openssl x509 -in developerID_application.cer -inform DER -out certificate_application.pem -outform PEM
The private_key_application.pem and certificate_application.pem files are all we need, permanently delete the following files:
csr.pemdeveloperID_application.cer
Developer ID Installer
The process is the same as above, first create a CSR:
openssl genrsa -out private_key_installer.pem 2048
rcodesign generate-certificate-signing-request --pem-source private_key_installer.pem --csr-pem-path csr.pem
Then start the Developer ID Installer certificate creation process:
Upload the CSR:
Download the certificate:
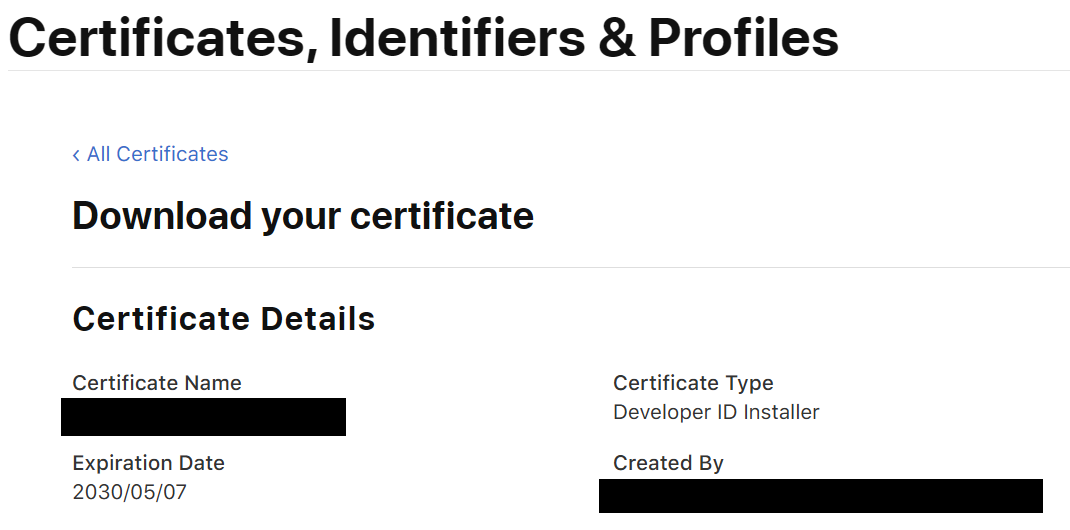
Finalize the certificate:
openssl x509 -in developerID_installer.cer -inform DER -out certificate_installer.pem -outform PEM
Permanently delete the following files:
csr.pemdeveloperID_installer.cer
App Store Connect API key
Next we need to create an API key for Apple’s notary service. Like code signing, notarization is also required by Gatekeeper.
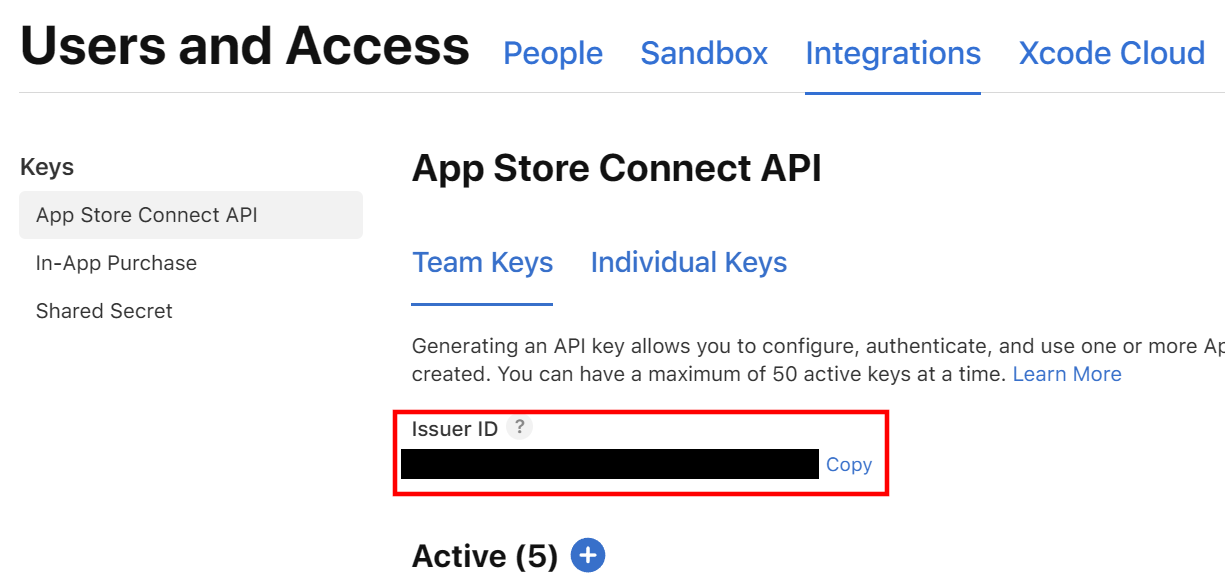
Go back to the Apple Developer Portal and click on the Users and Access link:
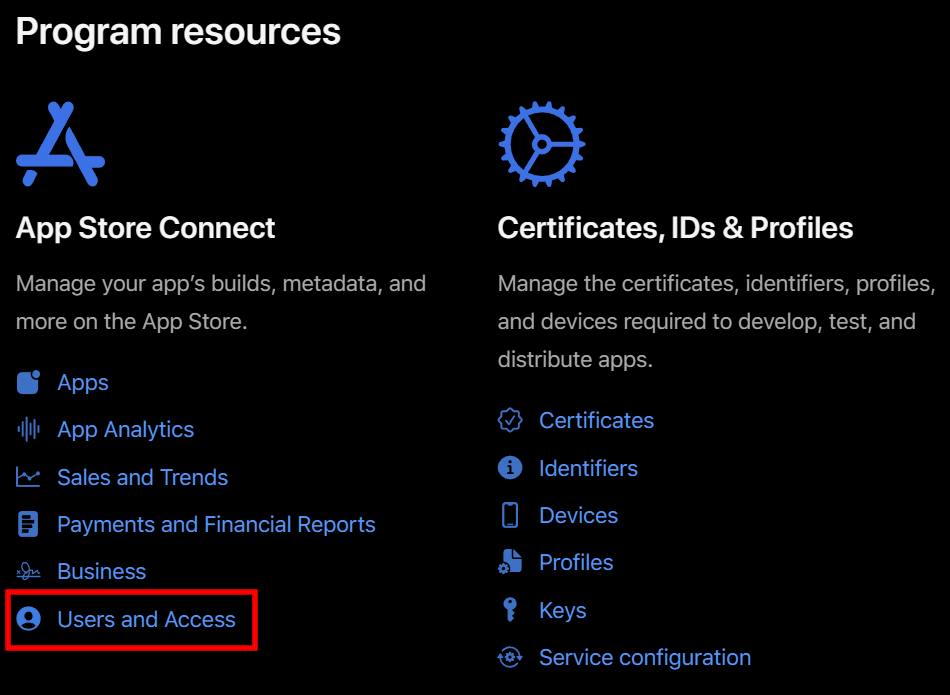
Click on the Integrations tab and then the App Store Connect API option under the Keys section to begin the creation process. Make sure to copy the Issuer ID as we will need that later.
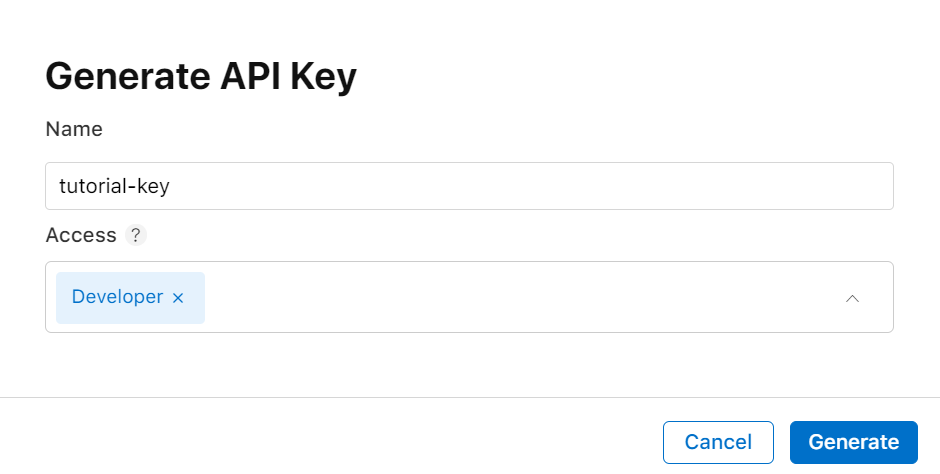
Choose a name for the key and make sure it has Developer access:
Download the key and also copy the Key ID as we will need that later:

The downloaded private key will be named AuthKey_<Key ID>.p8. Run the following command to save the information thus far into a single JSON file for better portability, with the <Issuer ID> and <Key ID> placeholders replaced by the values you copied earlier:
rcodesign encode-app-store-connect-api-key -o app_store_connect_api_key.json "<Issuer ID>" "<Key ID>" "AuthKey_<Key ID>.p8"
This will create a file called app_store_connect_api_key.json with the following content:
{
  "issuer_id": "<Issuer ID>",
  "key_id": "<Key ID>",
  "private_key": "..."
}
Permanently delete the AuthKey_<Key ID>.p8 file and wherever you noted the Issuer ID and Key ID (although the latter two are not sensitive data).
Process binaries
Now that we have the necessary Apple credentials, we can sign and notarize the binaries. All binaries must go through the following steps.
First, sign each binary in-place using the Developer ID Application certificate and associated private key:
rcodesign sign --pem-source certificate_application.pem --pem-source private_key_application.pem --code-signature-flags runtime rusty
The --code-signature-flags runtime enables the Hardened Runtime capability, which is a requirement for notarization.
Then, submit the binary to Apple’s notary service:
rcodesign notary-submit --api-key-path app_store_connect_api_key.json rusty
I’ve encountered a fair amount of flakiness with Apple’s notary service so I’d recommend setting the --max-wait-seconds to something quite long like 3600 seconds (1 hour). Additionally, you may even want to run such notarization steps in CI multiple times after you get everything set up once.
Create installer package
These steps require being on macOS.
Universal binary (optional)
If you wish to support users on both Apple Silicon and the older Intel architectures, you will need to build a universal binary. Assuming you have the following binaries:
rusty-aarch64-apple-darwinrusty-x86_64-apple-darwin
You can create a universal binary with the following lipo command:
lipo -create -output rusty-universal rusty-aarch64-apple-darwin rusty-x86_64-apple-darwin
This will create a rusty-universal binary that can be used on both architectures and is what the installer package will contain.
Finally, ensure the binary has the correct permissions:
chmod 755 rusty-universal
Preparation
The following values will be used to create the installer package:
<IDENTIFIER>: The ID of the distribution, usually the reverse-DNS of the project e.g.com.example.rusty. This can be whatever you want as long as it uniquely refers to the project.<VERSION>: The version of the project e.g.1.2.3.
If your project has a logo, I’d recommend creating an image that will be displayed on the installation window’s sidebar. The image’s height should be approximately 2.5x its width. The dimensions I use for Hatch and other projects’ macOS installer image are 1390x3680 (example).
Finally, create a temporary directory whose absolute path we will refer to as <TEMP_DIR>.
Component package
We need to create a component package with a structure that mimics the desired installation structure. A component package is a file ending in .pkg that will be nested inside the actual .pkg installer package.
Create a directory <TEMP_DIR>/root, whose absolute path we will refer to as <ROOT_DIR>. The structure should be as follows:
root
├── etc
│   └── paths.d
│       └── rusty
└── usr
    └── local
        └── bin
            └── rusty
The <ROOT_DIR>/usr/local/bin/rusty file should be the standalone binary users will run (or the universal binary if you created one).
The <ROOT_DIR>/etc/paths.d/rusty file should contain the path to the binary on the user’s machine:
/usr/local/bin/rusty
Adding this file to /etc/paths.d will ensure the binary is found when the user runs rusty from the command line.
Under some circumstances, a user’s shell may require extra configuration to properly respect path_helper. I’ve seen that with Nix users a few times.
Create a directory <TEMP_DIR>/components, whose absolute path we will refer to as <COMPONENTS_DIR>. Then run the following command to create the component package, with the placeholders replaced by the values from earlier:
pkgbuild --root "<ROOT_DIR>" --identifier "<IDENTIFIER>" --version "<VERSION>" --install-location / "<COMPONENTS_DIR>/<IDENTIFIER>.pkg"
This will create the component package file named <IDENTIFIER>.pkg.
Distribution package
The distribution package is the actual installer package that users will download and install. It will contain the component package as well as some metadata.
Create a directory <TEMP_DIR>/resources, whose absolute path we will refer to as <RESOURCES_DIR>. The structure should be as follows:
resources
├── LICENSE.txt
├── README.html
└── icon.png
The LICENSE.txt file (named however you like) should be the license of what you distribute. I’d recommend simply copying the project’s license file to this location.
The README.html file will be rendered for the user upon installation. It might contain something like this:
<!-- file: "index.html" -->
<!DOCTYPE html>
<html>
<head></head>
<body>
  <p>This will install Rusty v1.2.3 globally.</p>

  <p>For more information, see our <a href="https://example.com/setup/">Installation Guide</a>.</p>
</body>
</html>
The optional icon.png file should be the image that was noted earlier.
Next, create a distribution definition file <TEMP_DIR>/distribution.xml. It should contain the following content with the placeholders replaced by the values from earlier:
<!-- file: "distribution.xml" -->
<?xml version="1.0" encoding="utf-8"?>
<installer-gui-script minSpecVersion="1">
  <title>Rusty</title>
  <license file="LICENSE.txt" mime-type="text/plain"/>
  <readme file="README.html" mime-type="text/html"/>
  <background mime-type="image/png" file="icon.png" alignment="left" scaling="proportional"/>
  <background-darkAqua mime-type="image/png" file="icon.png" alignment="left" scaling="proportional"/>
  <options hostArchitectures="arm64,x86_64" customize="never" require-scripts="false"/>
  <domains enable_localSystem="true"/>

  <choices-outline>
    <line choice="<IDENTIFIER>.choice"/>
  </choices-outline>
  <choice title="Rusty (universal)" id="<IDENTIFIER>.choice">
    <pkg-ref id="<IDENTIFIER>.pkg"/>
  </choice>

  <pkg-ref id="<IDENTIFIER>.pkg"><IDENTIFIER>.pkg</pkg-ref>
</installer-gui-script>
If there is no image, the background and background-darkAqua elements can be omitted. The hostArchitectures attribute of the options element assumes a universal binary is being distributed. If that is not the case, then modify the value to refer to a single architecture.
Now, create the installer package:
productbuild --distribution "<TEMP_DIR>/distribution.xml" --resources "<RESOURCES_DIR>" --package-path "<COMPONENTS_DIR>" rusty.pkg
This will create the final installer package file named rusty.pkg.
Process installer package
Sign the installer package using the Developer ID Installer certificate and associated private key:
rcodesign sign --pem-source certificate_installer.pem --pem-source private_key_installer.pem rusty.pkg
Then, submit the installer package to Apple’s notary service:
rcodesign notary-submit --api-key-path app_store_connect_api_key.json --staple rusty.pkg
The --staple flag will staple the certificate to the installer package. The binaries were not stabled because Apple currently does not support that.
Secret storage
In order to go through this process again (like in CI) be sure to securely save the following five credentials:
certificate_application.pemprivate_key_application.pemcertificate_installer.pemprivate_key_installer.pemapp_store_connect_api_key.json